Aishwarya Pothula
Exporting Individual Fbx Files from Motive Recordings
The goal of this blog is to understand how to export individual mocap files from multi-skeleton mocap Motive videos and apply them to a model. You can also view a screen-recorded video of the tutorial.
Software used for the tutorial
- Motive
- Pre-recorded take
- Motion Builder
- Optitrack plugin for Motion Builder
- Rigged character - Peggy for the purpose of this blog
Pre-recorded take
For the purpose of our blog, we are using a pre-recorded take recorded using Motive software in 12 optitrack cameras in a motion capture setup. The take contains two actors fixed with active puck, for motion capture, interacting with a few objects such as a ball, a toy etc affixed with passive markers. The names of the two actors are Sanath and Rubel and their skeleton objects are named the same
Motion Builder
MotionBuilder is a 3D character animation software produced by Autodesk. A free version of the software can be downloaded with a student account. It is used for virtual cinematography, motion capture, and traditional keyframe animation. We are using Motion Builder to edit the recorded take from Motive and separate the characters.
Optitrack plugin for Motion Builder
We need the Optitrack’s Plugin for Motion Builder in order to stream MoCap data to Motion Builder. Install the plugin following the on-screen steps and restart Motion Builder if it is already running. After the MotionBuilder plugin has been installed, three OptiTrack devices will be added to the MotionBuilder ‘Assets Browser’ under the ‘Device’ section. Follow this link for a more detailed usage guide.
Downloading a Rigged character
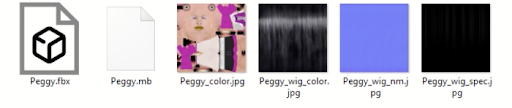
For the purpose of this blog, we will be making use of a rigged character, Peggy Sue. This model has bone mapping that matches with Motion Builder’s [MoBu] bone naming rules. We can use any character, but if the bone mapping of the model doesn’t follow MoBu naming, each bone has to be mapped manually. When you choose to download, peggy is downloaded as a .rar file. Extract from the .rar file and open ‘Peggy.fbx’
Streaming from MoCap
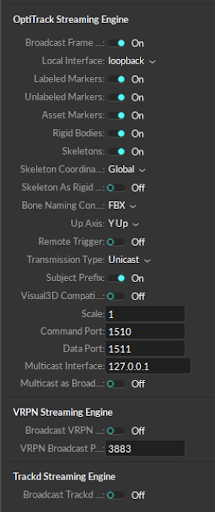
Load the pre-recorded mocap video from which individual mocaps are to be exported onto MoBu. To stream the recorded take into Motion Builder, open Motive and make sure that the ‘Data Streaming’ settings are as follows.
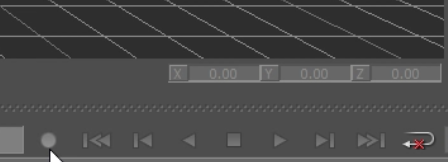
Go to ‘Edit’ mode. Make sure that the video is in ‘Loop mode’ and play the video. “Loop’ mode can be found at the bottom of the screen beside the video timescale

Recording in MoBu
Now, open Motion Builder. Download and install the Optitrack Plugin for Motive. Towards the bottom right of the screen from ‘Asset Browser’, select ‘Devices’ .
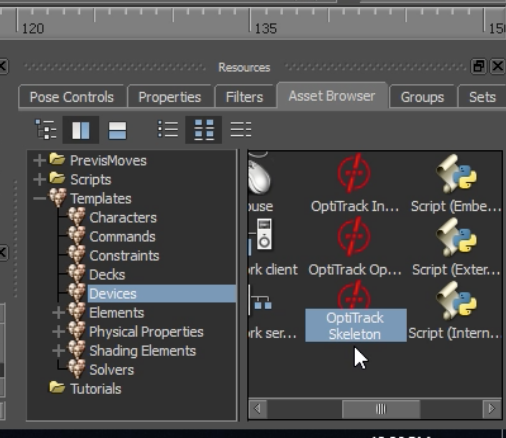
Drag ‘Optitrack Skeleton’ device in the Viewer or Navigator Hierarchy. This will add ‘I/O Optitrack Skeleton’ in the navigator. Click on ‘I/O devices’ and select ‘I/O Optitrack Skeleton’. Once the plugin interface is open, make sure that the ‘Multicast Interface’ in Motive ‘Data Streaming’ and ‘Local Address’ in MoBu (which is now 127.0.0.1) match.
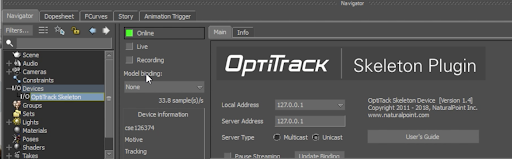
We set the plugin to Online by checking the box. It will show green when Motive is streaming and MoBu Plugin is connected. Check both the Live as well as the Recording option. The live option enables us to see the streaming data in the MoBu viewer. The Recording option enables us to record the streaming data inside MoBu. From the Model Building drop down we click on ‘create’ to create skeletons of the entities in the streaming data called Characters in the hierarchy. This step creates both characters as well as skeleton objects.

Go to Motive and drag the seekbar to the start. Back in MotionBuilder, recording the data being streamed by clicking on the record button right below the display. Select ‘overwrite’ when asked whether to overwrite current take. Then click play button to start recording.
Wait for the whole mocap video being streamed into MoBu to be recorded and click on the square stop button. It might take MoBu a few minutes to generate the new recording.
Now, disable the Live Option in the Skeleton Device Optitrack plugin as we now have the take inside MoBu. We can also disable the plugin at this point
Putting Mocap Recording onto Model
Once the recording is done, go to the ‘File’ menu and click on ‘Merge’. In the subsequent window choose ‘peggy.fbx’ [The rigged character]. You will then be presented with ‘Merge Options’. Deselect the existing take, right click on ‘Element’ in the ‘Scene’ block and click on ‘Append All Elements’.
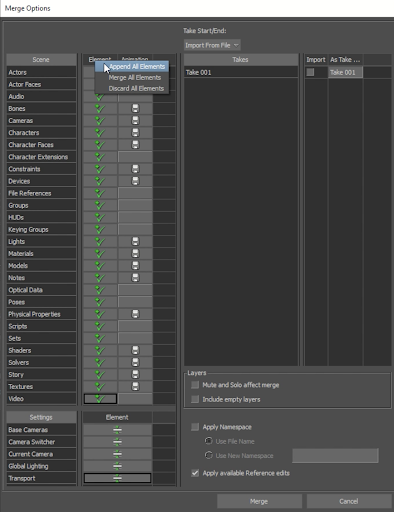
Then right-click on ‘Element’ near ‘Settings’ block and click on ‘Merge All Settings’. Click on ‘merge’ to finish merging.
Once the merging is complete, we are able to see Peggy on the Motion Builder viewer. In the characters hierarchy in the Navigator we are able to see Peggy’s ‘character’ Object.
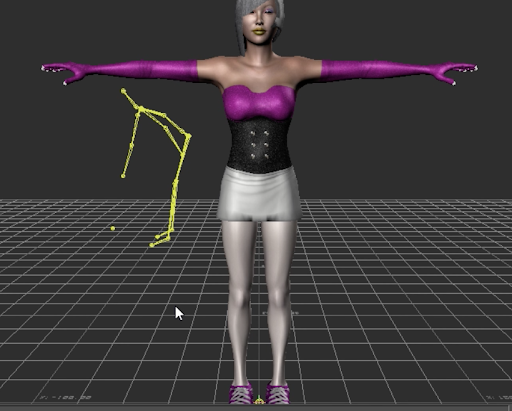
elect the character of whose mocap data you want to apply to Peggy. The character name will be the name you have from Motive. In the character settings, select input type as stance and check the active button. This will set the skeleton in T-Pose.
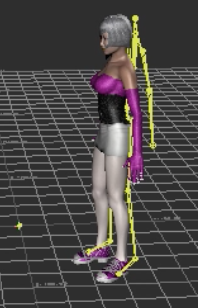
Then select Peggy’s character from the Character hierarchy and in the character settings select input type as character and select input source as the character whose mocap you want to apply. Make sure to check the ‘active’ box. Now, it looks like the Peggy character is superimposed on the skeleton and they are in sync. Then click on the ‘plot character’ option inside the character settings. From the pop-up select ‘skeleton’

And then click on plot. After plotting the characters, the active box might become unchecked, so you might need to recheck the active box. The ‘plot character’ enables the plotting of the Motive character or control rig animation to the model’s (Peggy) skeleton.
Now to create an fbx for for single character mocap, delete all other mocap entities.
The next step is to again select ‘Rubel’ character or the character whose mocap we are applying and uncheck the ‘active’ box in the character settings. If the active box is checked,the character always remains in the T-pose. But for Peggy’s Character the ‘active’ box needs to be checked
Now, when we click on the play button, we find that the ‘Rubel’s mocap is applied to Peggy.
Exporting Individual Mocap
To export the individual mocaps, select ‘save as’ from the file menu and save . An fbx file containing the mocap applied to the model(peggy) is created. The same procedure is to be followed to create MoCap->Model animation and extract the individual mocaps.
This video shows this whole process for Exporting the Motive Streaming to separate Characters.
These fbx files can be imported into unity to create user input controlled animations.